How to set up a VPN on Windows


admin
07.05.2018
How to set up a VPN on Windows
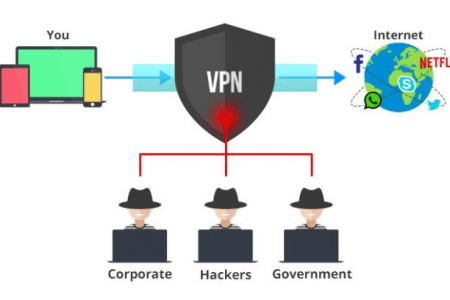
Most of the people do not get access to most of the websites because of their location. Hackers can easily get access to your IP address and then they can steal any information that they want. In this situation protection is very important otherwise you might lose some important information.
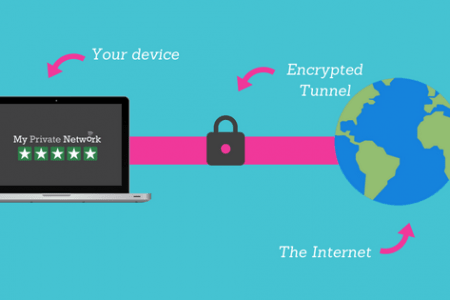
VPN is providing the best protection. It will provide a fake IP and location. The hackers will not be able to access your IP and so you can protect all the information that you have been sharing online. Another benefit of the VPN is that you can easily change your location and access any website that you want. With the help of a reliable VPN service, you will get the online protection that you want. In the present age, most of the people are using the Microsoft Windows. You will be surprised to know that Windows has the built-in VPN. We have prepared for you a complete guide to help you easily set up the VPN on Windows 7 and 10.
How to set up a VPN on Windows 7
If you want to set up VPN on your Windows 7 make sure that you follow the given steps properly. Do not miss any step because you might not get the required results.
· Step 1
You have to click on the start icon. You will see a search bar in which you have to type VPN. You have to click on the option of set up VPN-connection.
· Step 2
If connect your laptop to the server you want, make sure about entering a domain name and IP of the server. In case connecting to the VPN at work assure that you take some help from IT-administrator. He will give you the address of the best working server and network so you can get some extra speed.
· Step 3
In case you are only planning to set up the VPN network but you do not want to connect to the server you will have to check on the option of do not connect now. In case of connecting to the server immediately, so leave the option blank, then select “Next”.
· Step 4
It will take you to the next screen, here you will have to enter your username and password. You have the option of leaving this information blank. Once you want to get access to the actual connection you might have to provide this information. Now you have click on the option of connect.
· Step 5
You have to select the option of windows network logo if you want to connect to the VPN. it is present in the lower right corner of the screen. Under the VPN connection, you have to select the option of connecting.
· Step 6
In the box of connecting VPN connection, you will have to enter all the required information. It includes the long credentials of the users, appropriate domain and then click on connect.

· Step 7
In case you are unable to connect there might be some kind of error in the configuration of the server.
- There are different types of VPNs available ad the one you are using might not be compatible with your system.
- You have to check the network administrator.
- Here you can check which type of VPN you are using and in case it is PPTP then you have to go to the connect VPN connection screen and click on the option of properties.
· Step 8
You will have to navigate the security tab and here you can select the specified type of VPN mentioned in the drop-down menu. There is a chance that you will have to unselect the option of include windows login domain. It is presently under the tab of options. Now can click OK and connect. The VPN will be connected and you can enjoy using your browser for complete protection.
How to set up a VPN on Windows 10
It is the latest windows that most of the people are using these days. Setting up the VPN on windows 10 is very easy here we have the step by step guideline that will make the process easy for you. Assure that you properly follow all the steps for best results.
· Step 1
At the left side corner you will get the Cortana search bar, click on it and you can select the button on the taskbar. In the search bar, you will have to type VPN.
· Step 2
You will get any options and at the top, there will be the option of change VPN. You can also option the settings app and select networks and internet where you will get the option of VPN.
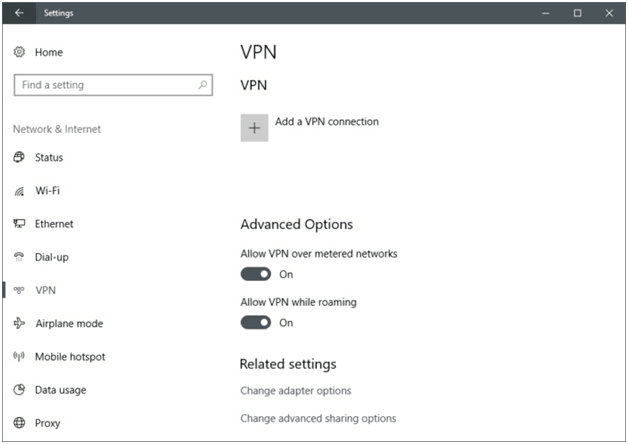
· Step 3
In the settings app at the top of the VPN screen, you can click on the option of adding a VPN connection.
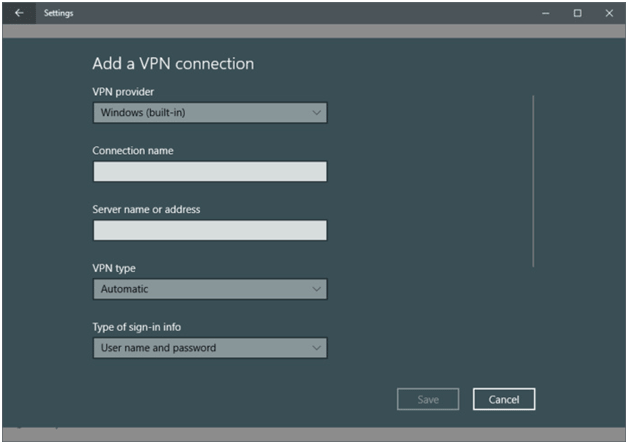
· Step 4
It will take you to another screen. You will have to enter all the details related to the VPN connection that you will be using. There will be the option of VPN-provider, here you will get the drop down menu where you will have to select the option of windows. In this way, the type of your VPN will be changed to automatic. Here you can enter the sign in information that includes the username and password.
· Step 5
It will take you to the next screen where you have to give the details of the server name, connection name or the address that you have. The information that you have to provide might vary according to the VPN provider that you are using. You can be using the VPN as the employer or the 3rd part service provider. Make sure that you use the VPN that can easily support different types of connections including:
- L2TP
- IKEv2
- PPTP
In this way, you will get better protection.
· Step 6
On the screen, you will have to scroll down and you will get a spot where you will have to enter your credentials like username as well as the password of the VPN that you are using. It is the information you will get from the VPN service provider. Once you have correctly entered all the required information you will have to select the option of save and then you will have to close the settings app.
· Step 7
To get the connectivity you will have to click on the icon of WiFi that is available in the taskbar tray of the screen. Here you can select the option of VPN that you have newly created. It will be present at the top of the list of your connections. Once you select the option the connection will be automatically created. It will only take a few seconds and the connection will be formed so that you can use the services.
Conclusions
Once you start using the VPN you will get the chance to use the browser the way you like. There will be no restrictions and you can easily use the services that you like. However, during the selection of the VPN, you have to be extra careful. Assure that you are using the best VPN and server that will meet all your requirements in the best way. You can select between the free and paid VPN.

09 July 2018
0
During an Internet session, each person encountered such a nuisance […]
05 May 2018
0
With the rising wave of technologies and development around the […]